Tampilkan postingan dengan label recipe. Tampilkan semua postingan

Jumat, 04 April 2014

Chocolate Treat So Sweet!


Chokladcupcakes (Chocolate Cupcakes)


"I know what you're thinking. Cherries in rum? Who the heck eats that? The first thing I think of is the chocolate praline filled with preserved cherries from the chocolate box Aladdin (which we usually eat around christmas in Sweden) which are always the only ones left in the box (except when my brother is around). But I promise, in this case they are delicious! If you know you don't like them, simply exclude them and replace with something else. They really do taste great in this recipe though!

Other than that I'm just looking for excuses to take pictures of cherries. They are so beautiful and very gratifying to photograph!"


Chocolate cupcakes
Makes approx. 10

•200 g flour
•2 tbsp cocoa powder
•0,5 tsp baking soda
•180 g sugar
•50 g butter, at room temperature
•1 large egg
•0,5 tsp vanilla powder
•0,5 dl canola oil
•0,5 dl buttermilk

Filling:
•Preserved cherries in rum (optional)

Preheat oven to 150 degrees C. Mix dry ingredients in a bowl. With an electric mixer, cream the butter and sugar until light and fluffy. Add oil and egg beating well.
Add flour mixture and buttermilk in three additions, beginning and ending with the flour. Scrape down sides of bowl. Fill paper liners about 2/3 full and bake for about 25-30 minutes. Let the cupcakes cool while you make the frosting. Cut a hole in the center of each cupcake and fill with a (or more if you want to) preserved cherry.


Whipped cream cheese frosting

•150 grams cream cheese
•1,5 dl heavy whipping cream
•0,5 teaspoon vanilla extract
•1 dl powdered sugar

Whip the cream in a large bowl. Mix cream cheese, powdered sugar and vanilla in another bowl. Mix everything together and whip until smooth. If the frosting is runny, put the bowl in the fridge for a while.


Minggu, 02 Februari 2014

A Sweet-Heart Treat


Red Heart Valentine’s Day Cookies


Cook time
8 mins
Total time
28 mins

Author: Tammilee
Recipe type: Dessert

Ingredients
  • 1 cup Smart Balance Buttery Spread Original
  • 1 cup sugar
  • 3 large eggs
  • 3¾ cups all-purpose flour
  • ½ tsp salt
  • 1 tsp baking soda
  • 2 tsp cream of tartar
  • 1½ tsp vanilla extract
  • Sprinkles and icing for decorating the cookies

Instructions
  • Cream together Smart Balance Buttery Spread original and sugar.
  • Add 3 eggs and blend well
  • Sift together flour, salt, soda and cream of tartar
  • Add in the flour mixture gradually to the creamy buttery goodness in your mixing bowl
  • Add vanilla and chill dough
  • Roll out dough and cut with cookie cutters, I used a Linzer Cookie Cutter to get the layered hearts
  • Place on ungreased cookie sheet, bake at 325 degrees for 6-8 minutes
  • Once cool assemble the cookies.


Minggu, 12 Januari 2014

Rose Cake

This looks fabulous! Simply gorgeous, fresh- and perfect for Vantine's Day! 
I can across this stunning "Rose Cake" at: GimmeSomeOven, so I will simply share the entire post with you, enjoy!

Rose Cake

"Friends, I made you a rose cake!
And yes, those are real roses.
And yes, they are edible!
I know, it was news to me too. I have been hearing everyone rave about the edible flowers trend right now, so decided to do some investigating. And it turns out that so many of my favorite flowers can be enjoyed in a vase on the table as well as your dinner plate — roses included! Apparently the more vibrant the rose petals — such as deep red or pink varieties — the stronger the flavor. Whereas the lighter or white roses are a little more mild."
"So I decided to go red and experiment with a rose cake recipe. I began with a classic 3-level white cake, accented with a hint of rose water (see notes below for where to buy). Then I (gasp!) chopped up a single red rose and incorporated it into a yummy vanilla rose buttercream. And then for the grand finale, I layered some beautiful red rose petals along the outside. And the photos hardly do it justice. This cake was beautiful."
"Still, I have to admit I was a little nervous about taste-testing a cake with all of these “edible” flowers. So I invited a bunch of friends over to join me. To my surprise, everyone loved it!!! Granted, we all are very familiar with the smell of roses, so maybe it shouldn’t have been such a surprise that we enjoyed tasting them too. But I think what was so fun was the entire experience of admiring and eating such a lovely cake. Every single layer — from the moist white cake, to the mild hints of rose in the buttercream, to the decorative roses on the cake — made for great conversation. So fun to try together!"
"I’m sure there will be all sorts of questions about this rose cake recipe, from what kind of roses to buy, to where you find rose water, to whether to coat the rose petals, etc. So I’ve included a brief Q&A below, but also encourage you to do your own research on edible flowers if you’re interested, since I’m no expert. But this was definitely a really fun one! So if you love roses and are feeling brave, I completely recommend giving it a try.
Happy rose-cake-making!"
Rose Cake
Prep Time: 30 minutes
Cook Time: 30 minutes
Total Time: 1 hour
Yield: 1 (8-inch) cake, or about 12-16 servings
Ingredients
Rose Cake Ingredients:
3 1/3 cups cake flour (13.5 ounces), plus more for dusting the pans
1.5 cups milk, room temperature
9 large egg whites, room temperature
1.5. almond extract
1.5 tsp. vanilla extract
1.5 tsp. rose water (or you can substitute more almond extract)
2 2/3 cups granulated sugar (18 ounces)
3 Tbsp. baking powder
1.5 tsp. salt
18 Tbsp. unsalted butter (2 sticks + 2 Tbsp), softened
8-10 roses, petals removed and rinsed
Rose Buttercream Ingredients:
1.5 cups (3 sticks) unsalted butter, softened
2 lbs. powdered sugar
3 tsp. rose water
2 tsp. vanilla extract
the petals from one rose, finely chopped
1/4 cup milk (or water)
Method
To Make The Rose Cakes:
Heat oven to 350 degrees. 

Grease three 8-inch round cake pans with nonstick cooking spray, then line the bottoms with parchment or waxed paper rounds. 

Spray the paper rounds, and then dust the entire inside of the pans lightly with flour, tapping to remove excess.

In a medium bowl, whisk together milk, egg whites, and extracts into 2-cup glass measure until blended. Set aside.

In the bowl of an electric mixer, mix together cake flour, sugar, baking powder, and salt in bowl of at medium-low speed until combined. Add butter, and continue mixing until incorporated and the mixture looks like moist crumbs. Add the milk mixture to crumbs and beat at medium speed for 2 minutes, stopping midway to scrape down the sides of the bowl.

Divide batter evenly between three prepared cake pans. (If you want to be really precise, you can weigh each cake pan to be sure that the batter is even.) Use a rubber spatula or spoon to spread the batter on top so that each pan is even. Arrange pans at least 3 inches from the oven walls and 3 inches apart. Bake for 26-30 minutes, or until a toothpick inserted in the center comes out clean.

Remove cake and let cool on a wire rack until they reach room temperature. Then frost with rose buttercream, and top with fresh rose petals.
To Make The Rose Buttercream:
In the bowl of a stand mixer, beat butter on medium-high speed until smooth. Add powdered sugar, rose water, vanilla, chopped rose petals, and milk. Beat on medium-low speed for 30 seconds to incorporate. Then increase speed to medium-high and beat for 1 minute or until smooth. To thin, add 2 tablespoons of milk at a time until the frosting reaches your desired consistency. To thicken, add milk.

Cake recipe just slightly adapted from Cooks Ilustrated, via Epicurious.

(c) 2013 Gimme Some Oven. All rights reserved.

Rose Cake Q&A:

Where can I buy rose water?

Rose water is commonly available at Middle Eastern and Mediterranean grocery stores, or at specialty grocery stores, at Whole Foods, or online. You can also check with your regular grocery store, but our two largest chains in Kansas City did not carry it.

Should I buy organic roses?

It is highly recommended. As always, the less chemicals/pesticides in any of our food, the better.

How do you wash the roses?

I popped mine in a salad spinner, but you could also rinse them however you see fit.
Which petals on the roses did you use?

I preferred the medium-sized petals that came from the middle of the roses. The petals on the outside seemed enormous and were often a little more flimsy. And the ones in the very center were perhaps too small and curled. But you can use whichever petals you like. It’s amazing how many petals are on a single rose!!

What if I don’t want to eat plain rose petals?

You can also sugar-coat them. Just brush them with a (whisked) egg white, then sprinkle with granulated sugar, and let them sit until the egg is dry.

Can I use dried rose petals?

Certainly! They just won’t look quite the same, and all of the above thoughts on washing/organic/etc hold true. So I would dry them yourself or purchase them from a vendor who you trust and know has not coated them with chemicals.
How many rose petals can I eat?

One source that I read recommended taking it easy on edible flowers if this is your first time consuming them. My friends and I did not experience any digestive issues, but still, anytime you eat something new it’s wise to be careful.

What if I just TOTALLY don’t want to eat rose petals?

No problemo. The buttercream tastes great with just the rose water, and you could always pick the outside petals off and not eat them. But I’d totally encourage you to at least give them a little taste test. ;)

Help! My rose petals won’t stick!

If you wait too long to attach the petals, the buttercream will dry a bit on the outside. But hakuna matata — just place a dab of extra buttercream on the back of the rose petal, and use it like glue to poke the petal in place.

Disclaimer: I also am not an expert in edible flowers, so you consume them at your own risk. However, my friends and I loved this recipe and I completely recommend it!


Selasa, 07 Januari 2014

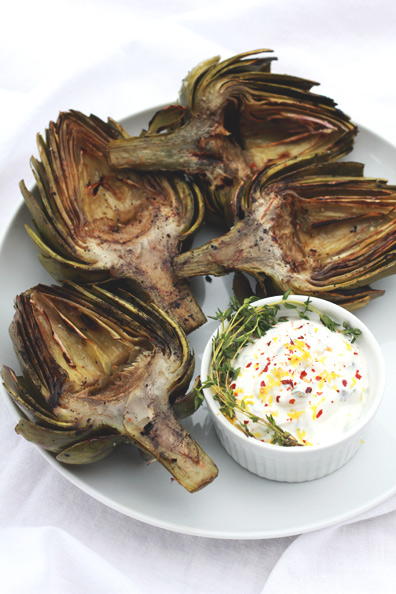
I love artichokes.


I love artichokes so when I came across this recipe from "Perpetually Chic" - I had to share with you, enjoy!


Grilled Artichokes

"I’m sharing today’s recipe by popular request on Instagram, but I’ll be the first to admit: My initial attempt at grilling artichokes might have looked great in the photo I shared a few weeks ago, but it was not a success by any means. In fact, they were a royal pain to eat and almost not worth the effort. It’s probably been 12 years since I’ve had fresh artichokes (my mom used to steam them), and I completely forgot about their hazards. Namely those pointy ends! Not only did I leave them on, causing us to poke ourselves as we tried to get to the meat, but I also forgot to scoop out the fibrous choke. It was a little bit of a disaster, not to mention my first attempt at aioli left me feeling like I was just missing something…"
"I’m happy to report I went back to the drawing board last night, determined to perfect grilled artichokes and make a worthy aioli to accompany them. This time I snipped off those sharp ends, cleaned out the middles, and slathered them with garlic-infused olive oil before grilling. Now when you pick one up, hot off the grill, you can simply peel back each leaf to scrape off the meat with your teeth and work toward that prized heart without getting attacked in the process. Oh, and the aioli turned out reaaallly good too. Keep reading for the recipe!"

Grilled Artichokes with Lemon-Thyme Aioli
2 large artichokes
Juice of half a lemon
2 tablespoons of olive oil
1 clove of garlic, cut into slices
Sea salt
Freshly ground black pepper


For the aioli:
1/4 cup Greek yogurt
1/4 cup sour cream
1/4 cup mayo1 teaspoon of dijon mustard
Juice of half a lemon
1 clove of garlic, minced
2 tablespoons of capers, drained
2 teaspoons of fresh thyme, chopped
1 tablespoon of fresh flat-leaf parsley, chopped
Red pepper flakes
Sea salt
Freshly ground pepper


Combine olive oil and one clove of garlic in a small prep bowl. Let the garlic infuse into the olive oil as you prepare the artichokes. Bring a large pot of salted water to a boil. Fill a large bowl with water and squeeze in the juice from one half of a lemon; throw in the lemon half. Working one artichoke at a time, trim off the sharp tops of each leaf. Cut off the bottom 1/2-1 inch of the stem. Cut the artichoke in half lengthwise through the stem. Scoop out the choke (fluffy fiber as well as the super thin leaves in the middle). Add each artichoke half to the lemon water to prevent browning as you continue to trim the next artichoke. Drain the artichokes and transfer to the pot of boiling water. Cook until tender but not falling apart, 10-15 minutes. Immediately drain and rinse with cold water to cool down. Transfer to a baking dish.

Meanwhile, combine Greek yogurt, sour cream, mayo, dijon and lemon juice in a bowl. Fold in garlic, capers, thyme and parsley. Season generously with red pepper flakes (I used a lot), then salt and pepper. Mix well. Garnish with lemon zest, a thyme sprig and extra red pepper flakes. Brush the garlic olive oil on each side of the artichokes. Season with salt and pepper. Heat a grill over medium-high heat. Grill the artichokes, about 3 minutes per side, until charred. Transfer artichokes to a plate and serve with the lemon-thyme aioli.


Minggu, 22 Desember 2013

Rustic Paris-Brest


"This dessert is not one to take on when you are short on time. This is one that requires, no demands a good amount of time in the kitchen, however the end result will definitely be worth it. It is also, unlike many other Paris-Brest recipes I've come across as it includes the addition of praline paste as a primary component of it's filling. And by the way, praline paste?? It will completely change your life. You will wonder why you've never had it before and why it is not commercially available here in the U.S. You will also feel more than a little robbed that you've not known about it before and almost giddy that you do now. 

What is praline paste exactly? Well it's simple yet profound. It's toasted hazelnuts and almonds, covered in caramelized sugar, cooled then whizzed around in the food processor to create the most luscious nut butter you've ever, ever eaten. More gah."


This is the good stuff. Praline Paste. Right here people. Look quickly because it's about to disappear. The recipe makes way more than this, this is just all I happen to have left after I may or may not have eaten most of it.

The Paris-Brest pastry was created in 1910 to celebrate the Paris-Brest 1200km bicycle race that began in 1891. Today the Paris-Brest race is run every 4 years, with the next one occurring August 2015. I can only imagine the flurry of Paris-Brest making that will occur when that day arrives. 

There have been exhaustive words written about how to prepare this delightful recipe and rather than rehash them here I will link you to Joe Pastry, for an excellent tutorial and recipe. I have used his recipe for the praline paste, and if you get a chance to check out the rest of his blog please do so. It's simply fantastic.


Paris-Brest
Serves 8


For the Praline Paste

8 oz. Sugar
1/4 C. Water
4 oz. Blanched Almonds, toasted
4 oz. Peeled or partially peeled hazlenuts, toasted
2-4 T. Hazelnut or vegetable oil


Place the nuts on a Silpat or parchment covered baking sheet, close together but not piled on top of each other. Set aside.

In a heavy bottomed saucepan over medium high heat combine the sugar and water. Swirl the pan frequently to combine the ingredients, but DO NOT stir them as crystallization will occur, and that's bad, very bad. Once the syrup has reached a dark brown color, remove from heat and pour immediately over the nuts. Set aside to harden and cool completely.

Once cooled, break in to pieces and place in a food processor. Process to a fine crumb. Add 1 T. of oil at time through the feed tube. Add oil just until a smooth paste begins to form. You may not need all of the oil so check after each addition to see if a paste is forming. It should look like "natural peanut butter" in texture when you are done.

Place in the refrigerator if you are not using immediately, but allow to come to room temperature if making the filling for the Paris-Brest at a later date.

For the Pastry: Get your scale and metric measuring cup for this one.

140 ml water
90 ml milk
90 g. butter
150 g. all-purpose flour, sifted
1 tsp. salt
4 eggs
1 additional egg, whisked
handful of sliced almonds
confectioners sugar for garnish

In a heavy bottomed sauce pan combine the water, milk, salt and butter and bring to a simmer. Add the flour all in one go and stir vigorously with a wooden spoon until completely combined. Cook the mixture over low heat for 4 minutes. The purpose of doing this is to dry the dough a bit and remove excess moisture. Transfer the mixture to a stand mixer fitted with a paddle attachment. Add the eggs, one at a time until the mixture is fully incorporated and fluffy.

Preheat your oven to 425 degrees F. Draw an 8" circle on a piece of parchment, using a lid or cake pan as a guide. Flip the paper over and place it on a rimmed baking sheet. Transfer the dough to a large pastry bag that tip is snipped to create a 1" hole. Carefully pipe the mixture on top of the circle. Make another circle on the inside of the first piped circle. Pipe a third circle on top of the two where they touch. Again, pop over to Joe Pastry for the visuals if you need to.

Brush the dough all over with the beaten egg, then use the back of a fork to lightly score long lines in the pastry to promote even rising. Sprinkle with the almonds.

Place the pastry in the oven and bake for 15, then reduce the heat to 350 degrees and bake for 30- 35 additional minutes. Five minutes prior to completion of the bake time, poke a hole with a sharp knife in several places around the base of the pastry. Once the pastry is sufficiently brown, turn off the oven, prop open the door and allow it too cool completely.

Set aside and prepare the cream filling.

For the filling:
5 egg yolks
80 g. sugar
40 g. flour, sifted
60 g. praline paste
350 ml. whole milk
2 tsp. espresso powder
150 g. unsalted butter at room temperature
1/4 tsp. salt

In a heavy saucepan, combine the milk and espresso powder. Simmer over low heat until warmed through and the coffee granules have dissolved. Set aside. In a medium bowl, whisk the egg yolks and sugar until light and fluffy. Add the flour and combine thoroughly. Slowly add the hot milk mixture to the egg mixture, whisking continuously. Once incorporated, return the mixture to the saucepan and heat over medium low, whisking until the mixture thickens. Place the mixture in the refrigerator until completely cold and chilled through. This is a very important step. If you skip it the filling will be too soft and not hold it's shape while piping. Also, avoid making this on a hot, hot day for the same reason.

Stir in the butter and praline, alternating, until a fluffy light cream has been achieved. Place the cream in a large pastry bag fitted with a large star tip.

Slice the top third of the cooled pate a choux ring and set aside. Pipe the cream in circles or large shells, on the bottom 2/3rds of the pastry. If the mixture gets too soft while piping, feel free to pop it back in the refrigerator to firm it up.

Gently place the top of the pastry on top of the filling, and sprinkle lightly with confectioners sugar.

Refrigerate until 1 hour prior to serving.


Recipes adapted from Joe Pastry and Mimi Thorrison


Minggu, 24 November 2013

Mmmmmm.


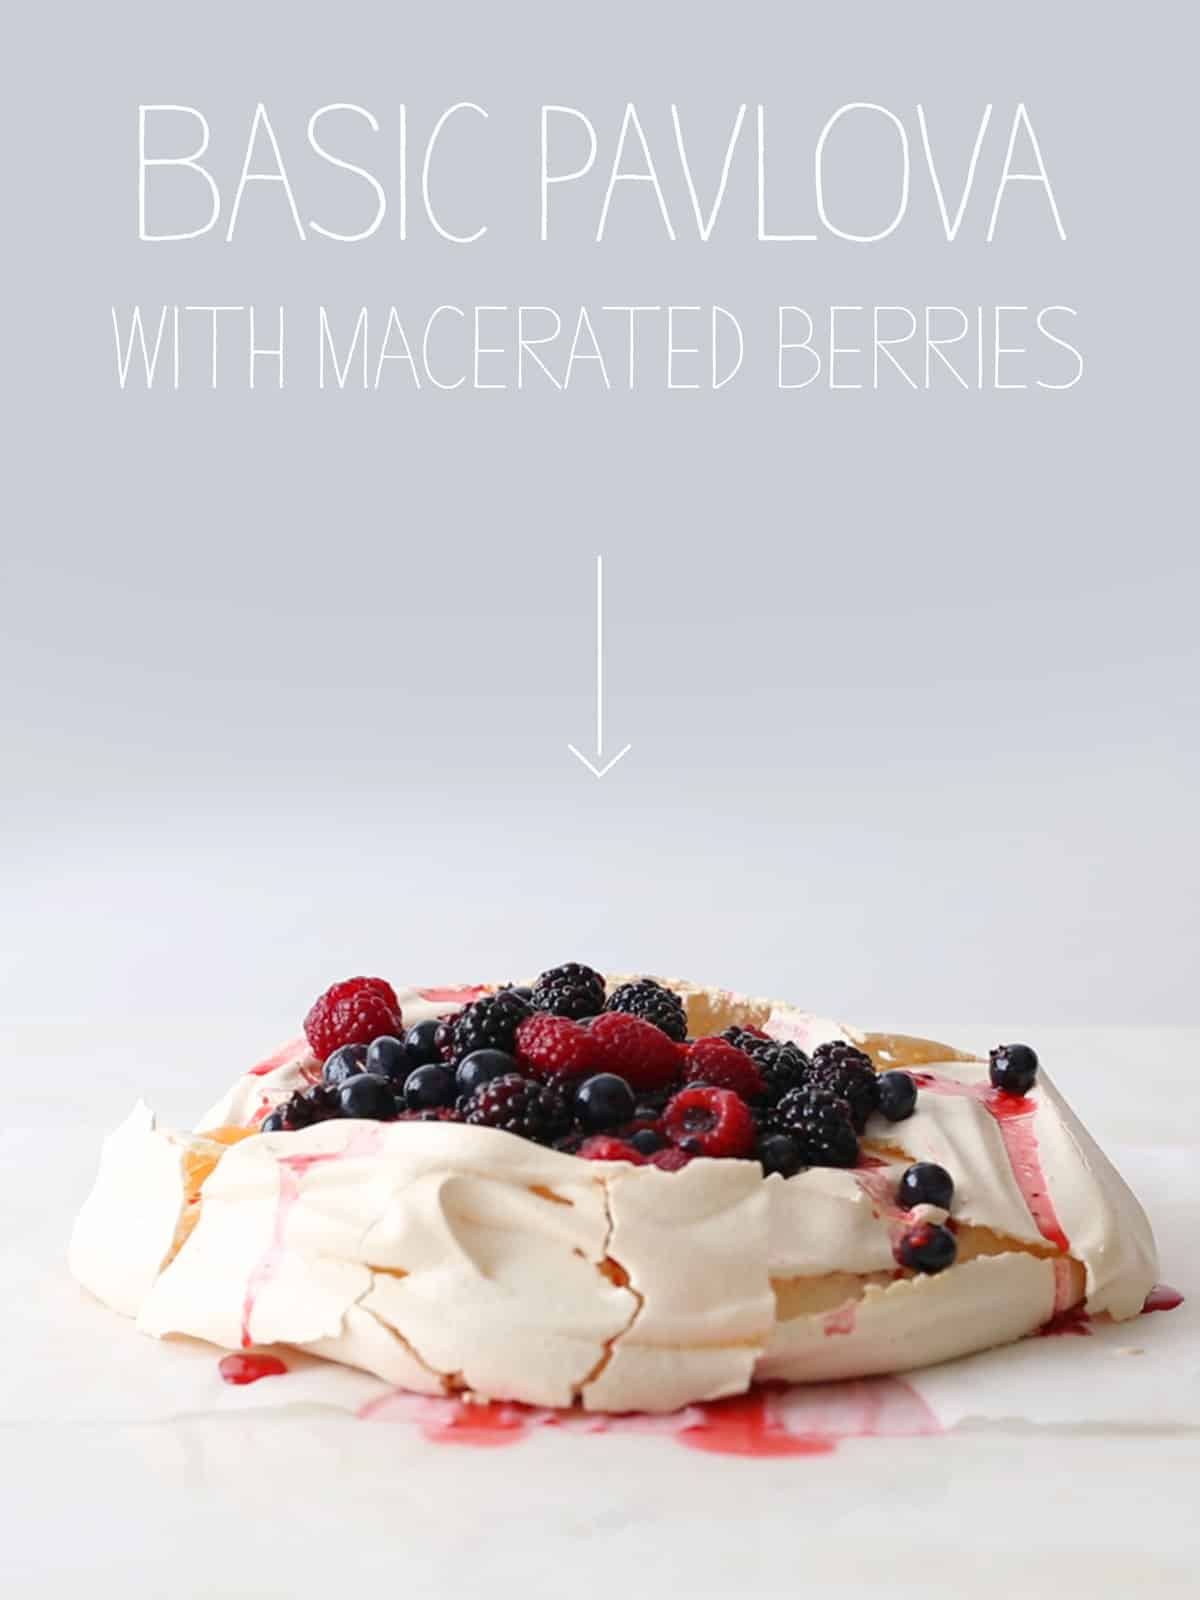
Basic Pavlova with Macerated Berries
Makes 1

Ingredients:
meringue:
4 egg whites
1 teaspoon cream of tartar, optional
1 teaspoon vanilla extract, optional
1 1/4 cups superfine sugar (granulated is fine)
macerated berries:
1 cup fresh raspberries
1 cup fresh blueberries
1 cup fresh blackberries
1/2 cup superfine sugar (granulated is fine)
2 tablespoons fresh lemon juice

sweetened whipped cream, optional

Directions:
1. Preheat oven to 300˚F.
2. For meringue: Place egg whites into a clean stand mixer bowl and whisk on medium speed until light and frothy. (If using cream of tarter and vanilla extract, add at this time)
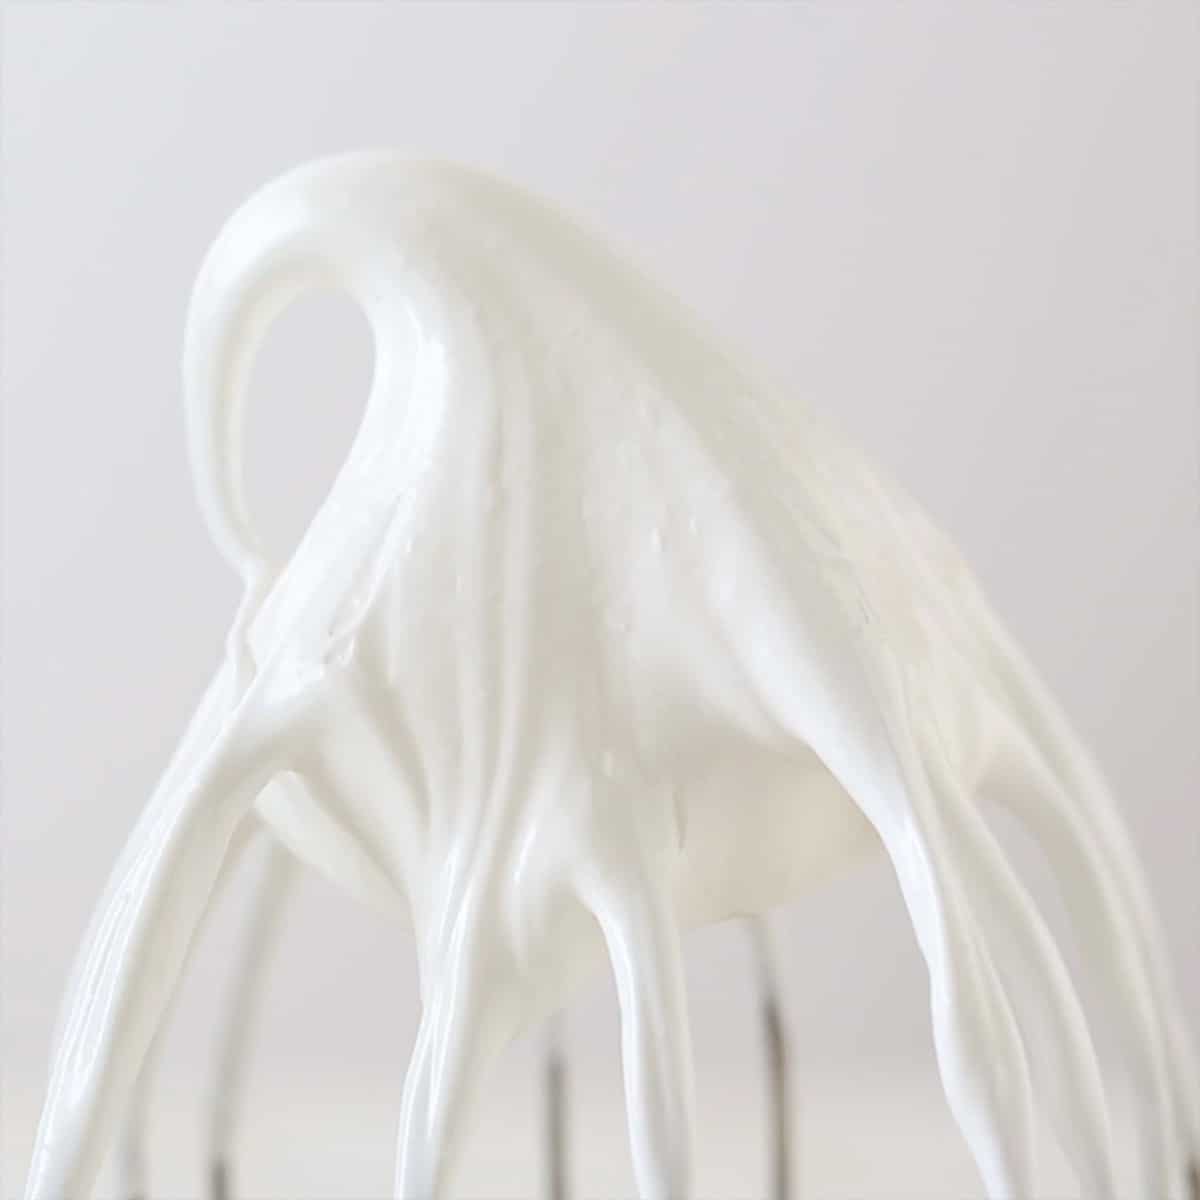
3. With the motor running, gradually add sugar until mixture is thick, fluffy, glossy, and medium-stiff peaks form.
4. Scoop and shape mixture onto a parchment lined baking sheet and place into the oven.
5. Once pavlova is in the oven, reduce temperature to 250˚F and bake for about 1 hour. Turn oven off and allow pavlova to sit and cool completely, 1 to 2 hours.
6. For macerated berries: Place all ingredients into a bowl and fold together, lightly mashing berries together. Allow mixture to sit for at least an hour before using.
7. To assemble: Top pavlova with whipped cream (if using), followed by the macerated berries and serve.


Minggu, 17 November 2013

Plum, Rosemary, and Brandy Cakes


A dreamy and delectable recipe today from

Plum, Rosemary, and Brandy Cakes


Plum, Rosemary, and Brandy Cakes


Plum, Rosemary, and Brandy Cakes
makes three 4½-inch round cakes
inspired by Adrian Richardson's The Good Life

3 - 4 small plums
¼ cup brandy
2 Tbspn dark brown sugar, lightly packed
200 g (1½ cups + ½ Tbspn) all-purpose flour
2½ tspn baking powder
½ tspn salt
1½ Tbspn fresh rosemary leaves, finely chopped
127 g (9 Tbspn) butter, at room temperature
125 g (½ cup + 2 Tbspn) sugar
2 large eggs, at room temperature
2 Tbspn buttermilk
powdered sugar


1. Pit the plums and cut into roughly ½-inch thick slices. Toss in a bowl with the brandy and dark brown sugar. Let the plums sit in the liquid for at least one hour.
2. Preheat oven to 350° F. Grease and flour three 4½-inch springform round cake pans. Set aside.
3. In a bowl, whisk to combine the flour, baking powder, salt, and chopped rosemary. Set aside.
4. In the bowl of a stand mixer, beat the butter and sugar on medium until light and fluffy, about 2 to 3 minutes.
5. Add the eggs one at a time, beating well after each addition.
6. Reduce speed and fold in the flour mixture in two additions, alternating with the buttermilk. Mix until incorporated, but do not overmix.
7. Divide the batter evenly between the three cake pans. Use the back of the spatula to smooth the tops and spread the batter out to the sides of the pan.
8. Strain the plum slices, reserving the brandy juice. Arrange the marinated plum slices on top of the batter.
9. Bake the cakes for about 40 minutes, until a toothpick inserted in the center of the cakes comes out cleanly and the edges of the cakes are beginning to turn light brown. Remove the cakes from the oven.
10. Immediately spoon all of the reserved brandy on top of the cakes, letting it soak in.
11. Let the cakes cool for 10 to 15 minutes on a wire rack before unmolding from the pans.
12. Sprinkle with powdered sugar before serving.


COPYRIGHT © STEPHANIE S

*